This morning, I was in the kitchen, mixing up a batch of biscuits, and I couldn’t help but think of my little Appalachian granny. The smell of the dough baking instantly took me back to those mornings with her—me and my cousins, all gathered around the kitchen, trying our best to make biscuits just like hers. It never quite worked out. No matter how hard we tried, our biscuits never tasted the way hers did. But that didn’t stop us from trying.
Granny was a firm believer that cooking was something everyone—boys and girls alike—should know how to do. “You never know when you’ll need to feed yourself,” she’d say, “and you don’t want to depend on anyone to do it for you.” She wasn’t just teaching us how to bake; she was teaching us how to take care of ourselves. It wasn’t fancy, it wasn’t complicated, but it was about learning to be self-sufficient.
I remember those mornings in her kitchen like they were yesterday—her perfect biscuits with that golden, buttery crust and soft, pillowy center. She always had this way of making it look so easy, but no matter how many times we tried, we never got it quite right. Maybe it was her years of experience, or maybe it was just the way she made everything feel effortless.
There was one moment, though, that stands out. Back in the 1980s, I entered a biscuit-making contest. I was young, but I thought, “Why not give it a shot?” After all, Granny always said we should put our best foot forward. To my surprise, I didn’t just make a good batch—I came in second place in the entire state of North Carolina! I was proud, but at the same time, I couldn’t help but laugh. Granny’s biscuits still had that magic I couldn’t quite replicate, no matter how hard I tried.
This morning, as I stood there, mixing the flour, lard and buttermilk, I couldn’t help but think of her. These biscuits might not have been exactly like Granny’s, but they were made with the same love she taught me to put into everything. And honestly, that’s what matters most.
Granny taught me more than just how to bake. She taught me how to carry on traditions, how to take pride in the little things, and how to always make sure I can take care of myself. So while my biscuits may not ever taste like hers, I’m still proud of them—because they remind me of her, and of everything she taught me.
And who knows? Maybe one day, I’ll pass down the recipe to my own nieces and nephews. If they’re lucky, they’ll get to learn the magic behind it too. Enjoy the recipe below.
-Tim Carmichael
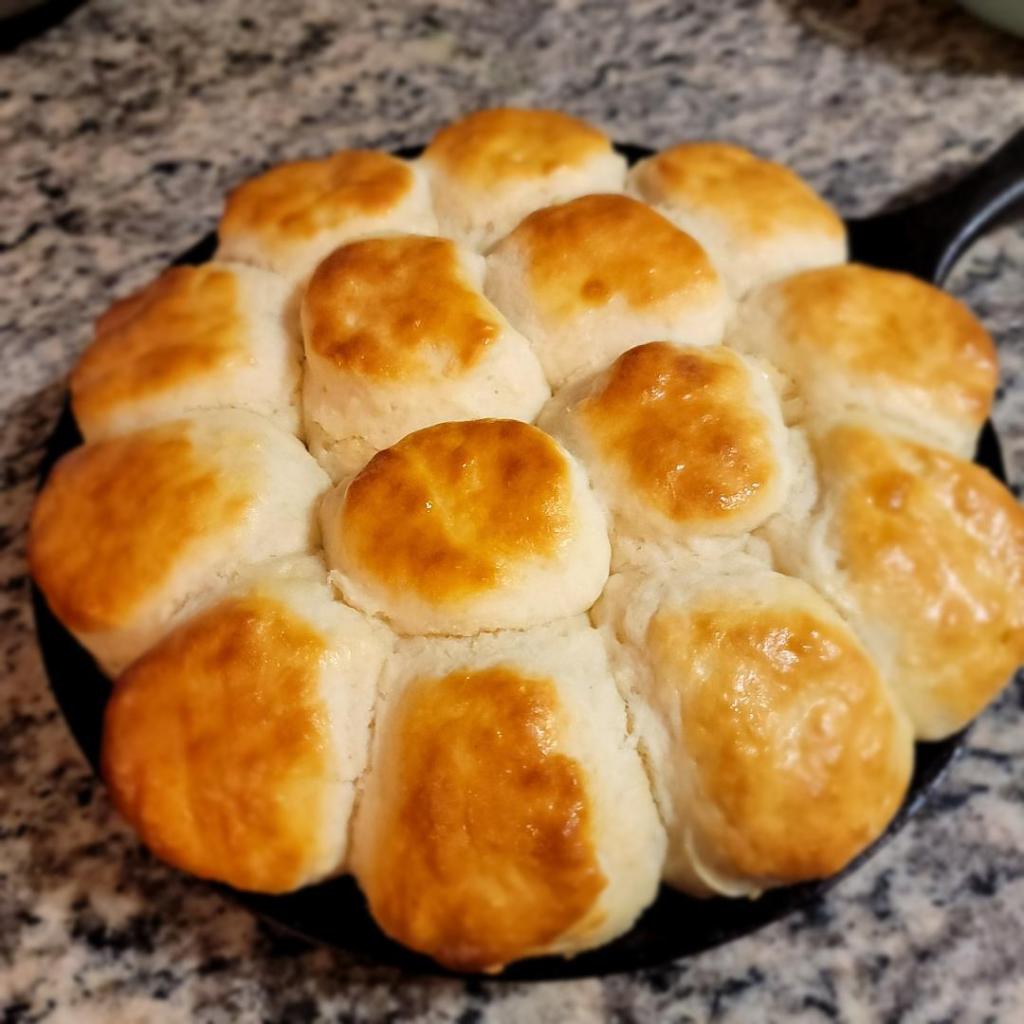
Flaky Buttermilk Biscuits
Ingredients:
- 2 cups self-rising flour
- 1/2 cup lard (cold, cut into small chunks)
- 3/4 cup buttermilk (cold)
- Pinch of salt (optional, if you want a bit more seasoning)
Instructions:
- Preheat your oven to 500°F and grease a cast iron skillet with lard.
- Prepare the dry ingredients:
- In a large mixing bowl, combine the self-rising flour and a pinch of salt (if using). Stir to combine.
- Cut in the lard:
- Add the cold lard to the flour mixture. Using a pastry cutter, two forks, or your hands, work the lard into the flour until the mixture resembles coarse crumbs with pea-sized bits of lard still visible. These little bits of lard will help create flaky layers in the biscuits.
- Add the buttermilk:
- Pour the cold buttermilk into the flour-lard mixture. Gently stir with a spoon or spatula until the dough begins to come together. Be careful not to overmix—this will ensure your biscuits are light and flaky. If the dough is a bit sticky, that’s okay.
- Turn out the dough:
- On a floured surface, gently turn out the dough. With floured hands or a rolling pin, lightly pat the dough to about 1-inch thickness.
- Cut the biscuits:
- Use a round biscuit cutter (or a drinking glass) to cut out biscuits from the dough. Press straight down with the cutter—don’t twist, as twisting can seal the edges and prevent them from rising properly.
- Bake:
- Place the biscuits onto the prepared skillet, side by side for soft sides or spaced apart for crispier edges. Bake in the preheated oven for 10-12 minutes, or until golden brown on top.
- Serve:
- Remove from the oven and let cool slightly before serving. These biscuits are perfect with butter, honey, or your favorite jam!
Tips:
- Keep your lard cold to ensure a flaky texture. If needed, chill the lard in the freezer for a few minutes before cutting it into the flour.
- For even fluffier biscuits, try to handle the dough as little as possible. The less you work it, the lighter the biscuits will be!
Enjoy these classic, buttery, and flaky biscuits!

Leave a comment